Introduction
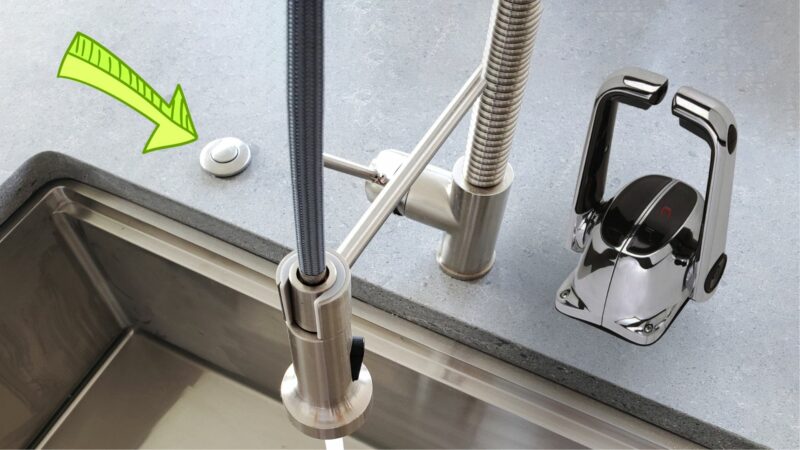
A garbage disposal air switch is a convenient and safe alternative to traditional wall switches for controlling your garbage disposal unit. By eliminating the need for electrical connections near the sink, it provides an extra layer of protection against water damage and potential electrical hazards. In this article, we will guide you through the process of installing a garbage disposal air switch, ensuring a hassle-free and efficient setup.
Before you begin…
Before diving into the installation process, it’s essential to gather all the necessary tools and materials. Here’s a list of items you’ll need:
- Garbage disposal air switch kit (includes an air switch button, air tubing, and an air switch unit).
- Screwdriver (preferably a Phillips-head screwdriver).
- Adjustable wrench.
- Drill (if required).
- Pliers.
Now, let’s move on to the installation steps
Step 1: Choose a Suitable Location: Select a convenient and easily accessible spot on your kitchen countertop or sink for installing the air switch button. Ensure that it’s close enough for comfortable reach but far away from potential splashes or sources of water.
Step 2: Prepare the Air Switch Unit: Open the packaging and take out the air switch unit. Depending on the model, you may need to remove any protective covers or packaging materials. Familiarize yourself with the different components of the air switch unit, such as the electrical wires, mounting bracket, and the air tubing connection.
Step 3: Turn Off the Power: Before proceeding, it’s crucial to cut off the power supply to the garbage disposal unit. Locate the circuit breaker or fuse dedicated to the disposal and turn it off. Verify that the power is indeed off by testing the disposal switch.
Step 4: Disconnect the Electrical Wiring: Carefully remove the electrical connections from the existing wall switch. Use a screwdriver to loosen the terminal screws and detach the wires. Ensure that the wires are not touching each other or any conductive surfaces to prevent accidental shocks.
Step 5: Connect the Air Switch Unit: Take the air switch unit and connect the electrical wires to the corresponding terminals on the air switch. Follow the manufacturer’s instructions and secure the connections tightly. Use electrical tape to insulate the exposed wire ends for added safety.
Step 6: Mount the Air Switch Unit: Using the mounting bracket provided with the kit, attach the air switch unit to the desired location on the countertop or sink. If necessary, use a drill to create holes for the screws. Ensure that the unit is firmly secured to prevent it from coming loose during use.
Step 7: Install the Air Tubing: Connect one end of the air tubing to the air switch unit and the other end to the air switch button. Trim the excess tubing if required, leaving enough length for smooth operation. Use pliers to secure the tubing connections tightly.
Step 8: Test the Installation: With the air switch button now in place, restore the power to the garbage disposal unit by turning on the circuit breaker or fuse. Test the air switch by pressing the button and verifying if the disposal unit activates. If everything functions correctly, proceed to the final step.
Step 9: Finalize the Installation: Inspect all the connections and ensure they are secure. If any adjustments are needed, make them at this stage. Additionally, use Teflon tape to seal any threaded connections to prevent leaks. Clean up any debris or excess materials from the installation area.
Conclusion
Installing a garbage disposal air switch provides a convenient and safe way to control your disposal unit. By following the step-by-step instructions outlined in this guide, you can easily set up an air switch, enhancing the functionality and safety of your kitchen. Remember to exercise caution during the installation process, and if you encounter any difficulties or are uncertain, consult a professional electrician to assist you.

